Importing Parts Inventory Files into Manage Online
Parts inventory files can be imported into ALLDATA Manage Online.
This is helpful if your shop has:
- been tracking your inventory on a spreadsheet.
- exported your parts inventory from a different shop management system into a spreadsheet.
Step 1: Download the Spreadsheet Template
Your parts inventory spreadsheet must be formatted in a way that is compatible with Manage Online. Download the spreadsheet template to copy/add to.
- Click Setup >> Parts Inventory Import.

- Click here.
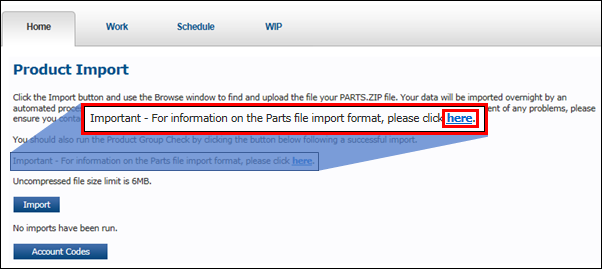
- Click HERE.
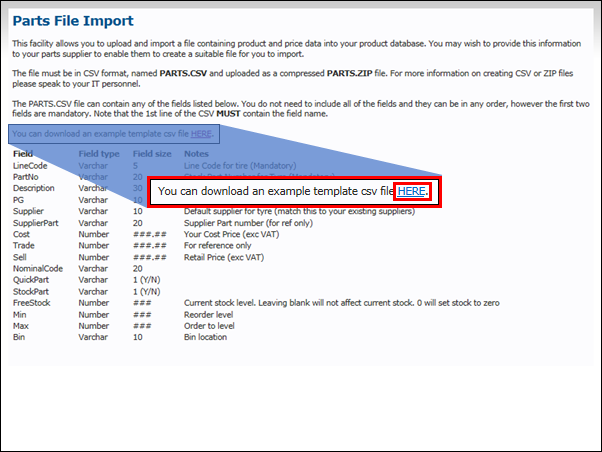
- Download and save the Parts.zip file that will pop up.
- Open the Parts.zip file >> Open the Parts.csv file.
- Save the Parts.csv file.
- Note: The template file contains three part entries as examples.
Step 2: Format Your Spreadsheet
Two options:
- Copy/paste information from your existing parts inventory spreadsheet into the template spreadsheet that you just saved.
- Format your existing parts inventory spreadsheet to match the template formatting.
Required formatting:
- The following items must be formatted exactly as they are on the template:
- Column names (even if there is no data for the column)
- Format of information in each column
- Note: Only the LineCode and PartNo fields are required. Leave the remaining fields blank if there is no information available.

- Line Codes: The Line Code names on the spreadsheet must match the Line Codes that are in Manage Online.
- All Line Codes must be created in Manage Online before the Parts Inventory Spreadsheet can be uploaded.
- For instructions, see Settings - Line Codes.
- Show a side-by-side screenshot of them matching.
- All Line Codes must be created in Manage Online before the Parts Inventory Spreadsheet can be uploaded.
- File name: Save the spreadsheet as a .csv file titled Parts.csv.
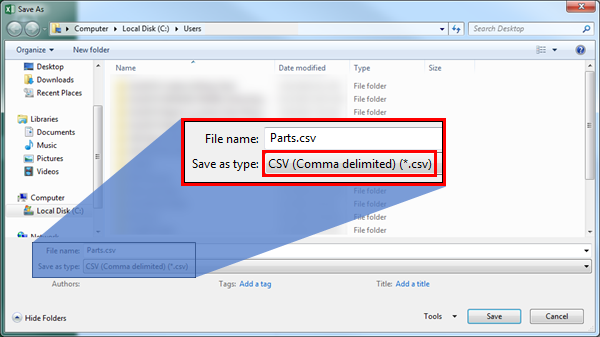
- File format: Compress the Parts.csv file into a .zip file.
- Right-click the Parts.csv file (on the file name or desktop icon) >> click Send to >> click Compressed (zipped folder).
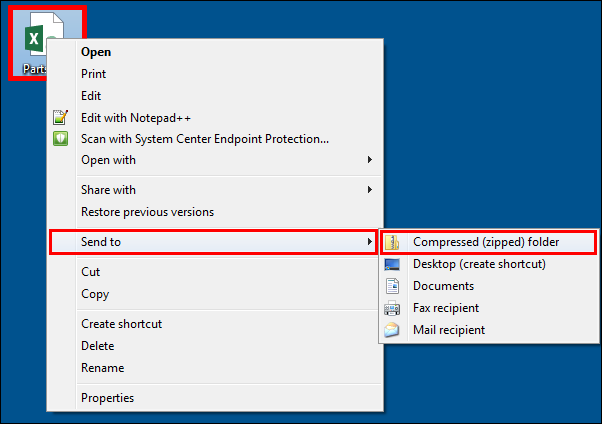
- The Parts.zip file has been created.
- Do not change the name from Parts.zip.
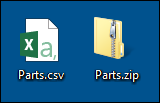
- Do not change the name from Parts.zip.
- Right-click the Parts.csv file (on the file name or desktop icon) >> click Send to >> click Compressed (zipped folder).
Step 3: Upload Your Spreadsheet
- Click Setup >> Parts Inventory Import.

- Click Import.

- Click Browse... >> select the Parts.zip file.
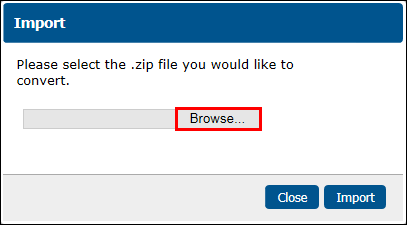
- Click Import.
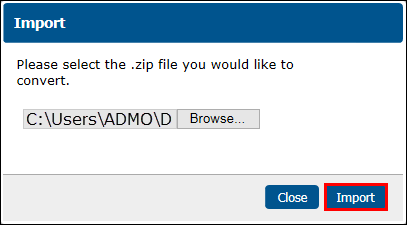
- The Parts.zip file will import. How do I know it worked?
- Click View Report to view the time and date the file was uploaded.
- Click Account Codes to assign account codes to the imported parts.


