


Using the Nexpart Catalog
Before getting started, make sure to link your Nexpart account to Shop Manager in Settings >> Catalogs
Add parts vendors to Nexpart
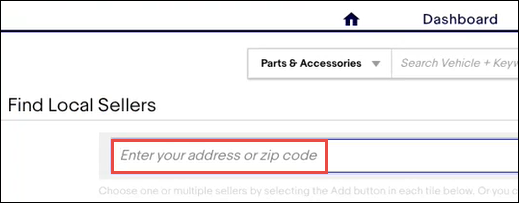
- Within the Nexpart Multi-Seller catalog, click Find/Refer Sellers in the top navigation menu.

Enter your address or zip code.
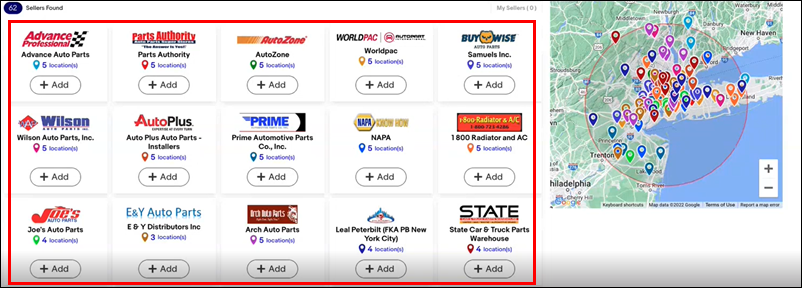
- A list of local vendors will appear.
- Note: If your Vendor is Nexpart enabled, but does not show on the list, you can add them by going to Dashboard >> +Connect Seller and using credentials that have been provided to you by the vendor.
- A list of local vendors will appear.
- Click +Add on the vendor you would like to add.
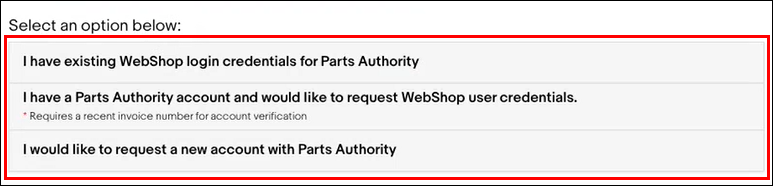
- Select an option that best describes your current relationship with the vendor and complete the sign in/sign up process.
Set Vendor Priority
- Within the Nexpart Multi-Seller catalog, click Dashboard in the top navigation menu.

- In the My Sellers section click and hold the "hamburger" icon to drag and drop your vendors into the appropriate order.

Add parts to your document
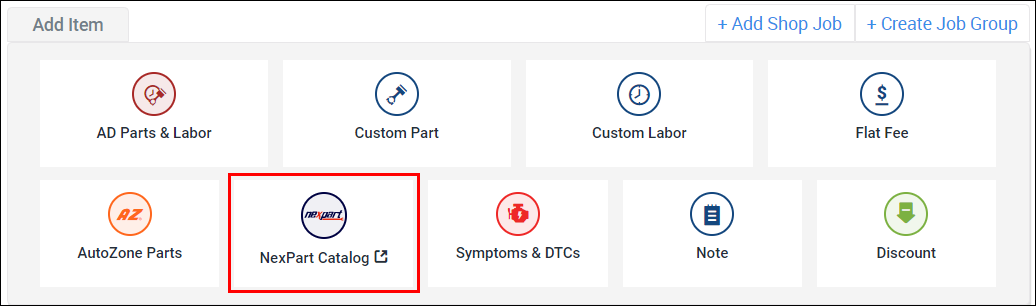
- Select Nexpart Catalog from the add item ribbon.
- Verify or update additional vehicle specifics as required.
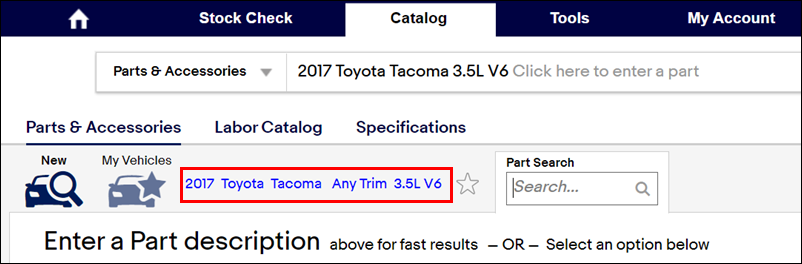
- Search or select an option to browse the catalog for parts.

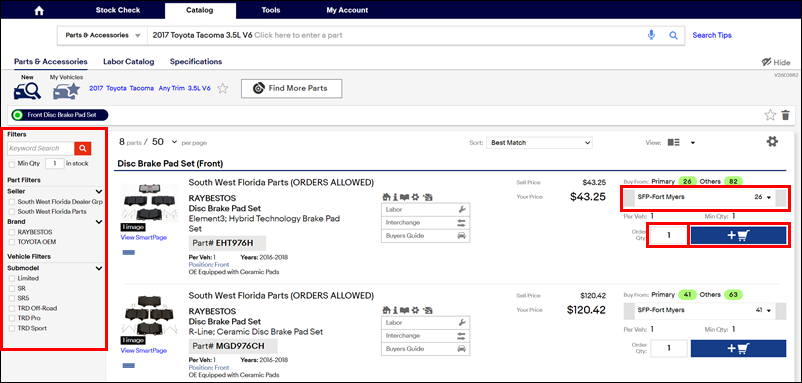
Filter available parts (optional) >> select a store location >> enter a quantity >> click the add to cart button.
- The selected parts will now appear as line items in Shop Manager.
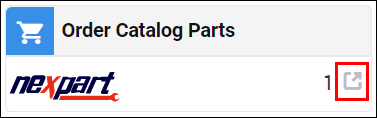
Order parts
- Click the Nexpart punchout icon.
Verify or make changes to your order as necessary >> click Place Order.
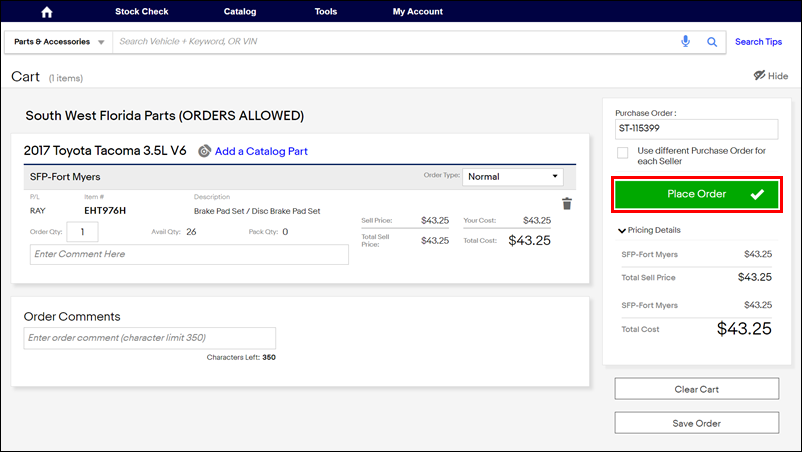
- The order number will now display on the line item in Shop Manager.
Receive the parts order
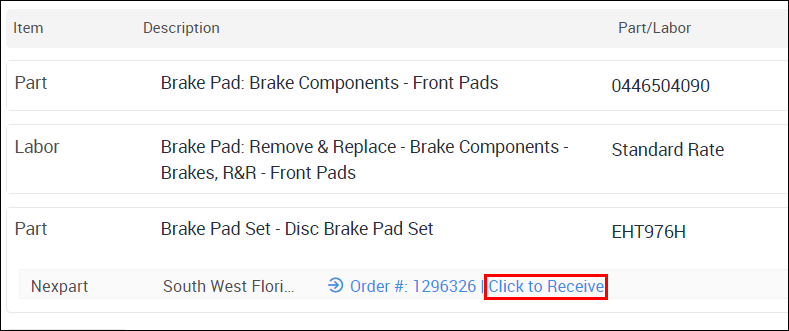
From the Work document
Use the Click to Receive button on the line item for an ordered part.
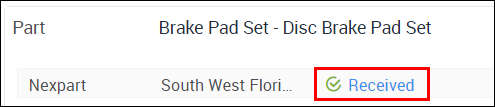
- The order will now appear as Received on the line item.
- The order will now appear as Received on the line item.
From the Orders screen
- Click Orders from the menu on the left.
- Use the search, filter and sort options at the top of the screen to locate the order you want to receive >> click Receive Order.
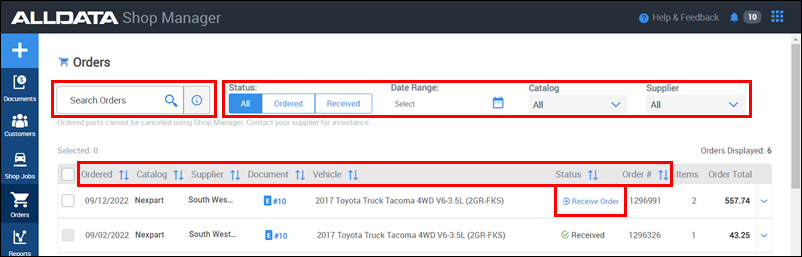
- The status will change to Received.