
Thanks to a friend who bought two Honda CT-90s, I recently found myself assisting in the diagnosis and repair of these esoteric antique cycles. In June 1963, Honda debuted this lightweight, small cc (barely a) motorcycle. They were so popular that the Beach Boys wrote the very popular tribute song: ‘Little Honda’.


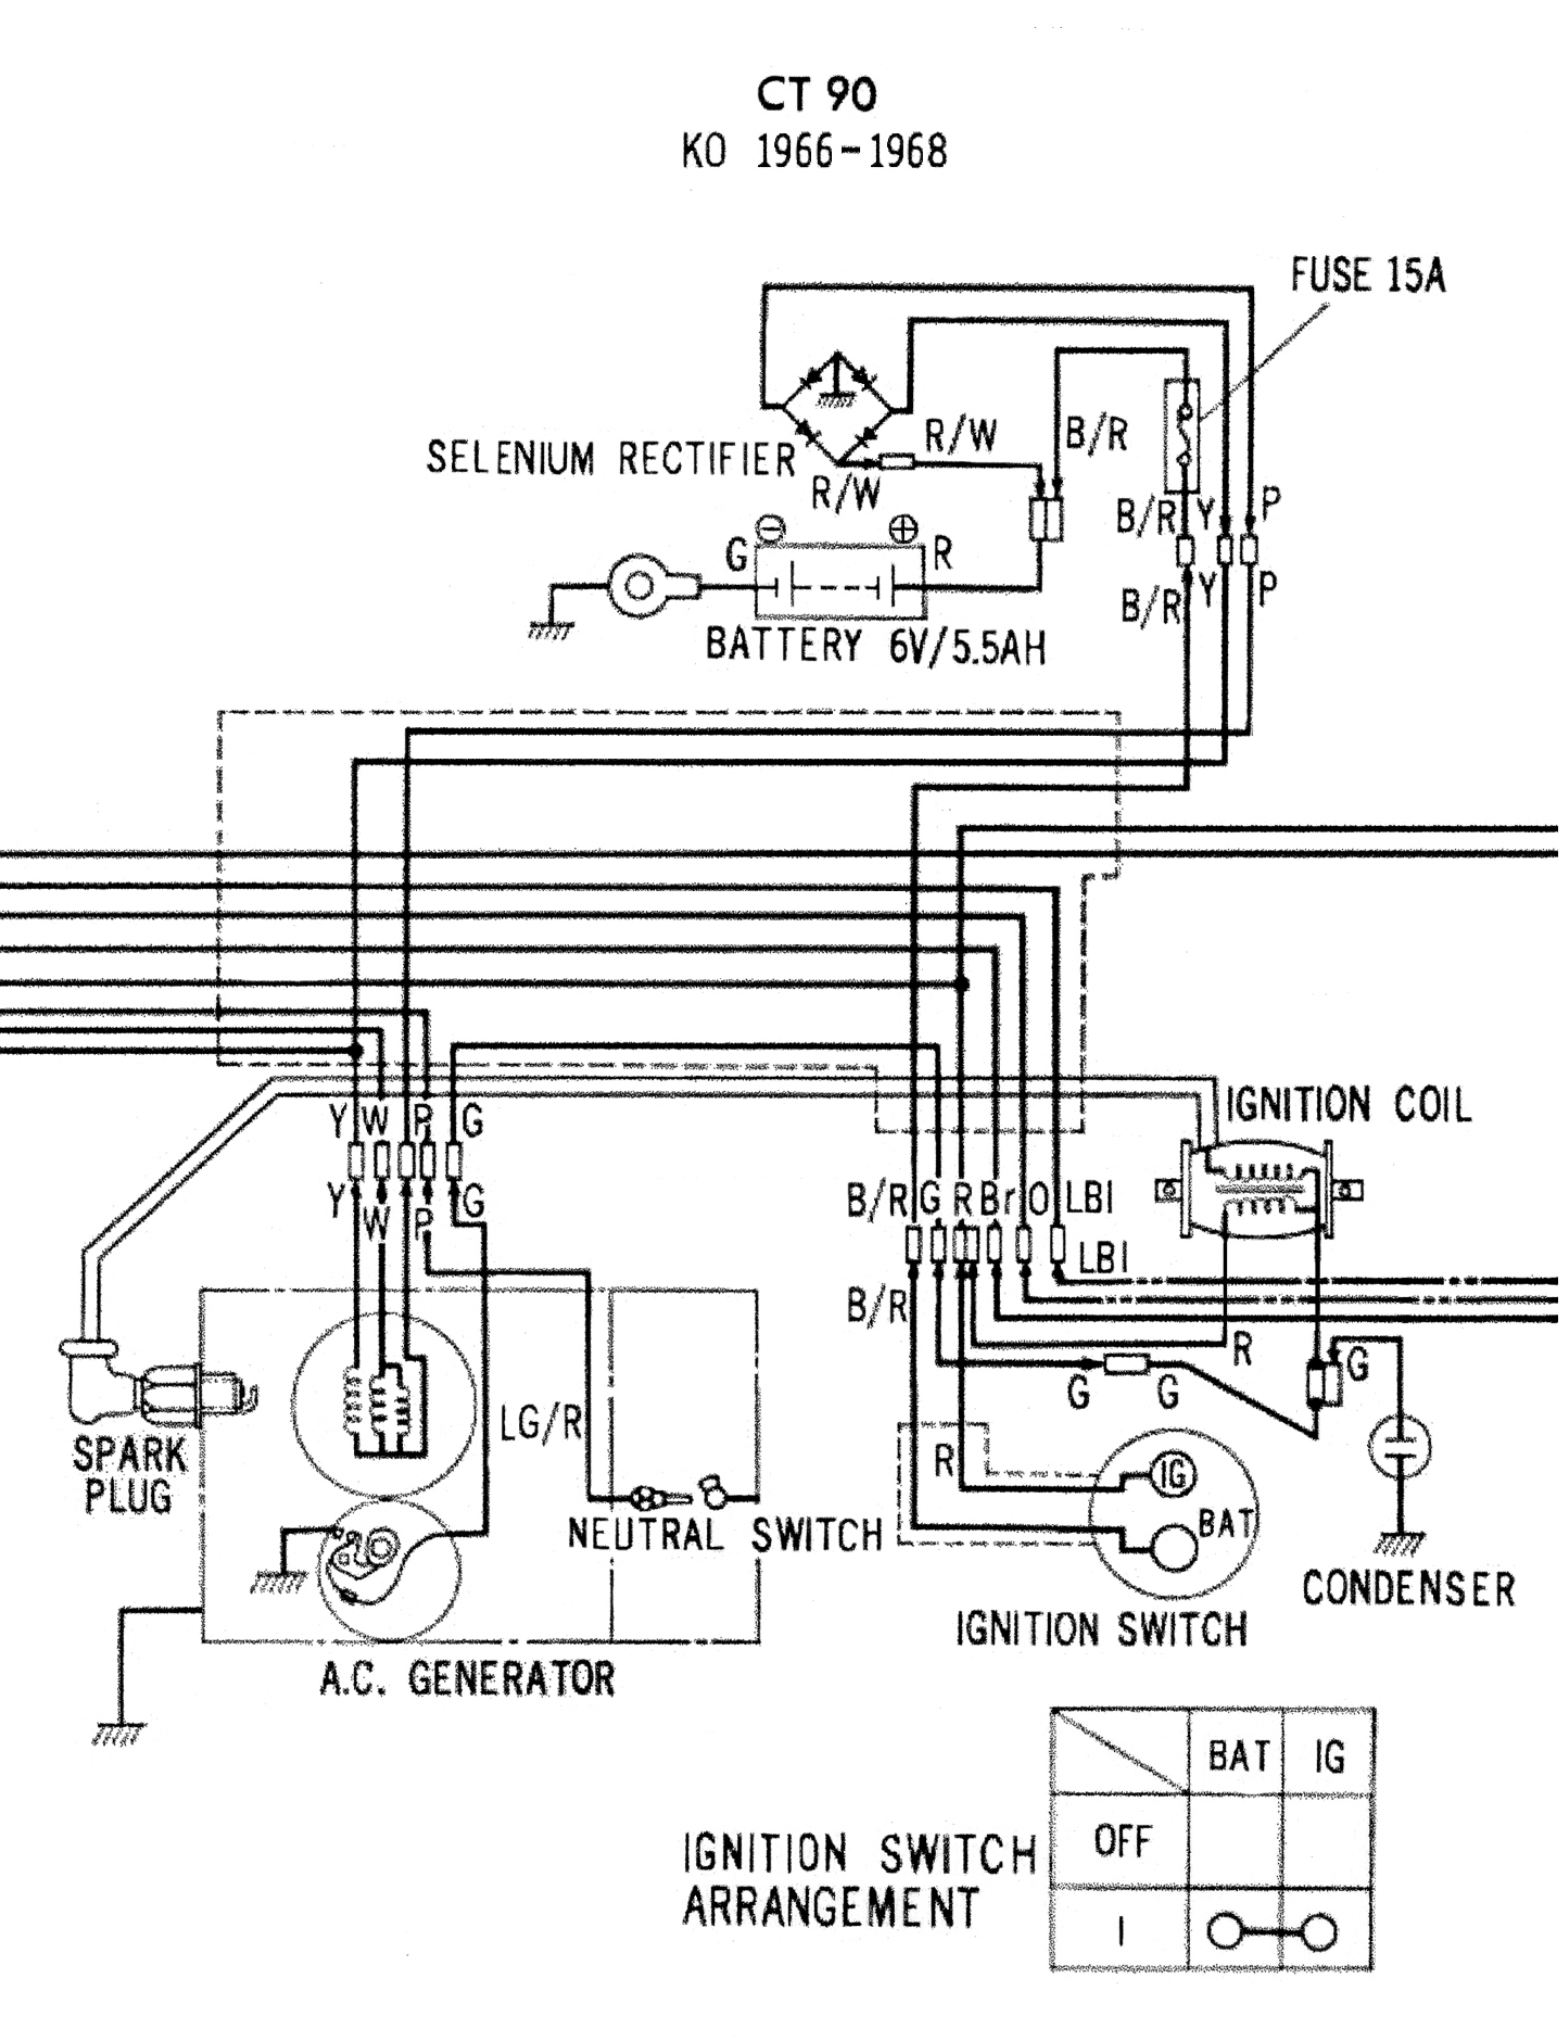
I started my diagnostics by tackling the starting problems. The bike would start on the first kick sometimes. Other times it had no spark. A quick check confirmed that the battery would put out its rated 6 volts of direct current (VDC) with the load of a headlight bulb applied. Knowing that the battery was good, I had to determine if the voltage was making its way to the ignition system. While the ignition coil is a bit hard to get to, the ignition switch wiring is accessible, so I thought I would start there. The ignition switch is fed by the one and only fuse (15 AMP) that in turn is connected to battery positive. With the switch installed in the electrical system I checked for B+ of 6 VDC at the Blue/Red wire where it enters the switch. Voltage was present. But is the switch any good? I placed the DVOM leads on the switch terminals, one lead per terminal, and cycled the switch on and off. Sometimes the voltage drop across the switch contacts was an acceptable one tenth (0.1) of a volt. Cycling the switch repeatedly would occasionally produce a 5 VDC drop.
Replacing the defective switch was one option. (Surprisingly, you can still buy many of the parts for this 53-year-old bike that is eligible for AARP membership.) I thought I would give a contact cleaner/contact lube spray a chance to work its magic. With a good soak and time to dry, the switch was back in full operation and intermittent no start was checked off my list.
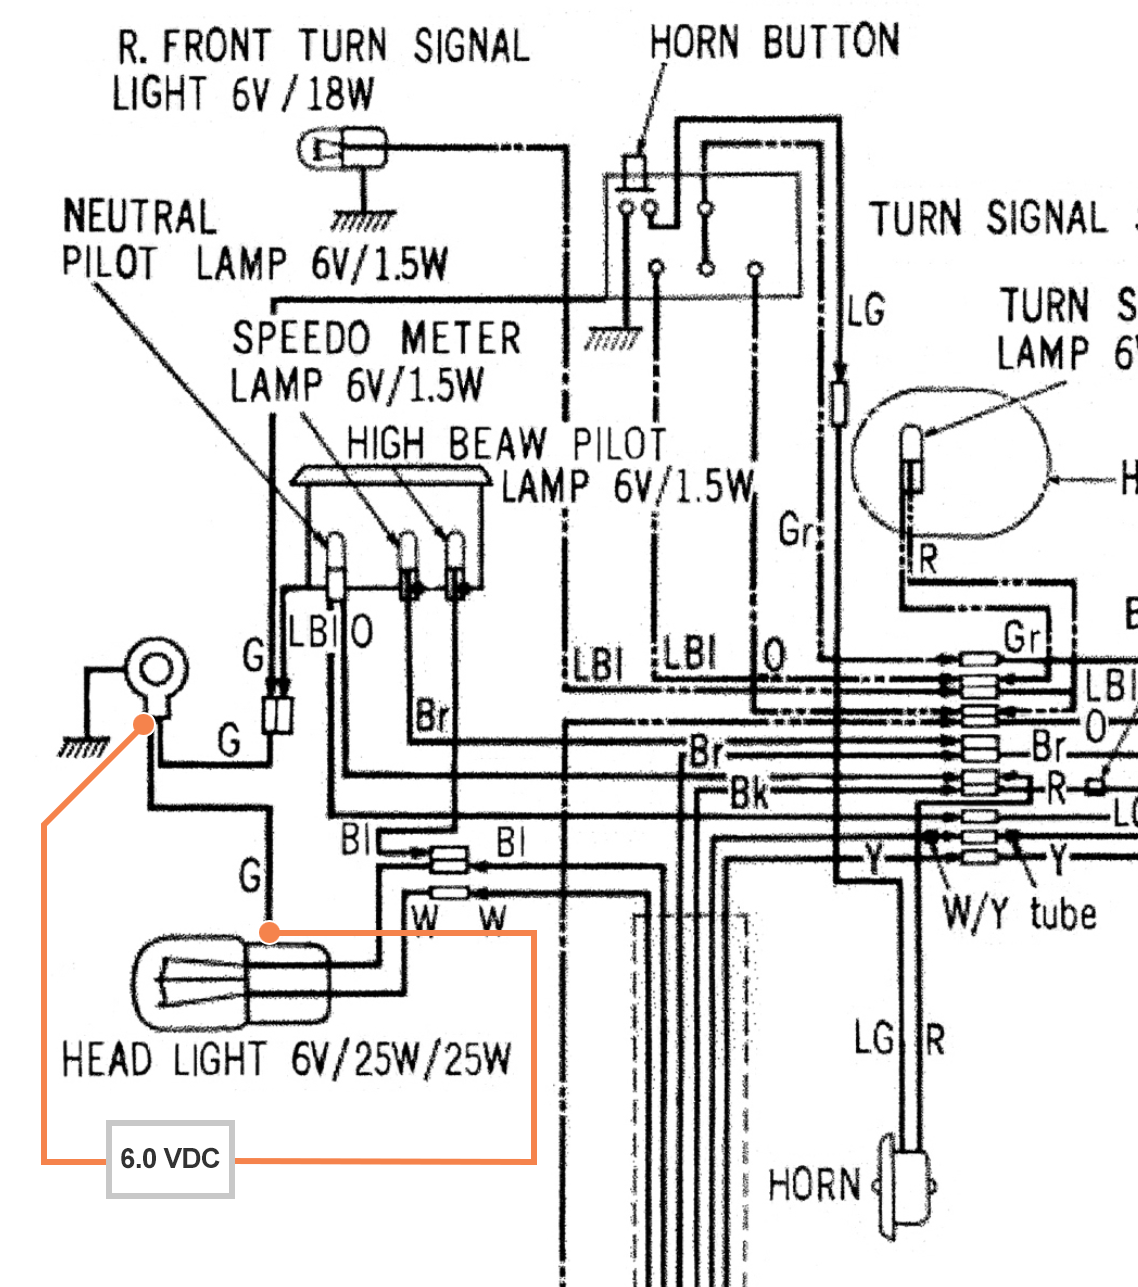
With the bike running, I was still in electrical diagnosis mode. I thought I would determine why the single bulb, dual filament headlight would not work on high or low beam. As a side issue, the Neutral and High Beam indicator lights in the instrument cluster were also inoperative. The wiring diagram showed that all three lights shared a common ground connection inside the headlight housing.
I was doing my voltage checking at the ground ring terminal in the headlight housing. With the headlight switch ON, a check of voltage on the B+ side of the bulb showed the expected battery voltage. When checking the ground side of the bulb, I encountered battery voltage again instead of the expected near-zero volts. Clearly, there was a weak ground. The ring terminal has two ground wires crimped into it. Those wires go to the indicator lights and the headlight bulb ground shell. When I gave those green wires a little tug, they both exited the crimp. An application of a new ring terminal, with both crimp and solder, fixed that connection for the next 50 years.

So, what did I learn here? Using voltage drop testing techniques serve me well no matter what electrical maladies I tackle. What else did I learn? I learned that I still remember a few things from decades ago and that I will probably never touch point ignition again.
Want to see how ALLDATA can improve shop efficiency? Check out our suite of products, each designed to contribute to both shop efficiency and productivity.
If you would like to read more articles like this one please subscribe to ALLDATA News.


